
Connect to a vehicle
Two transports, one rule: prove the link with a single identification read before doing anything else.
CAN with J2534
- Install the adapter vendor driver.
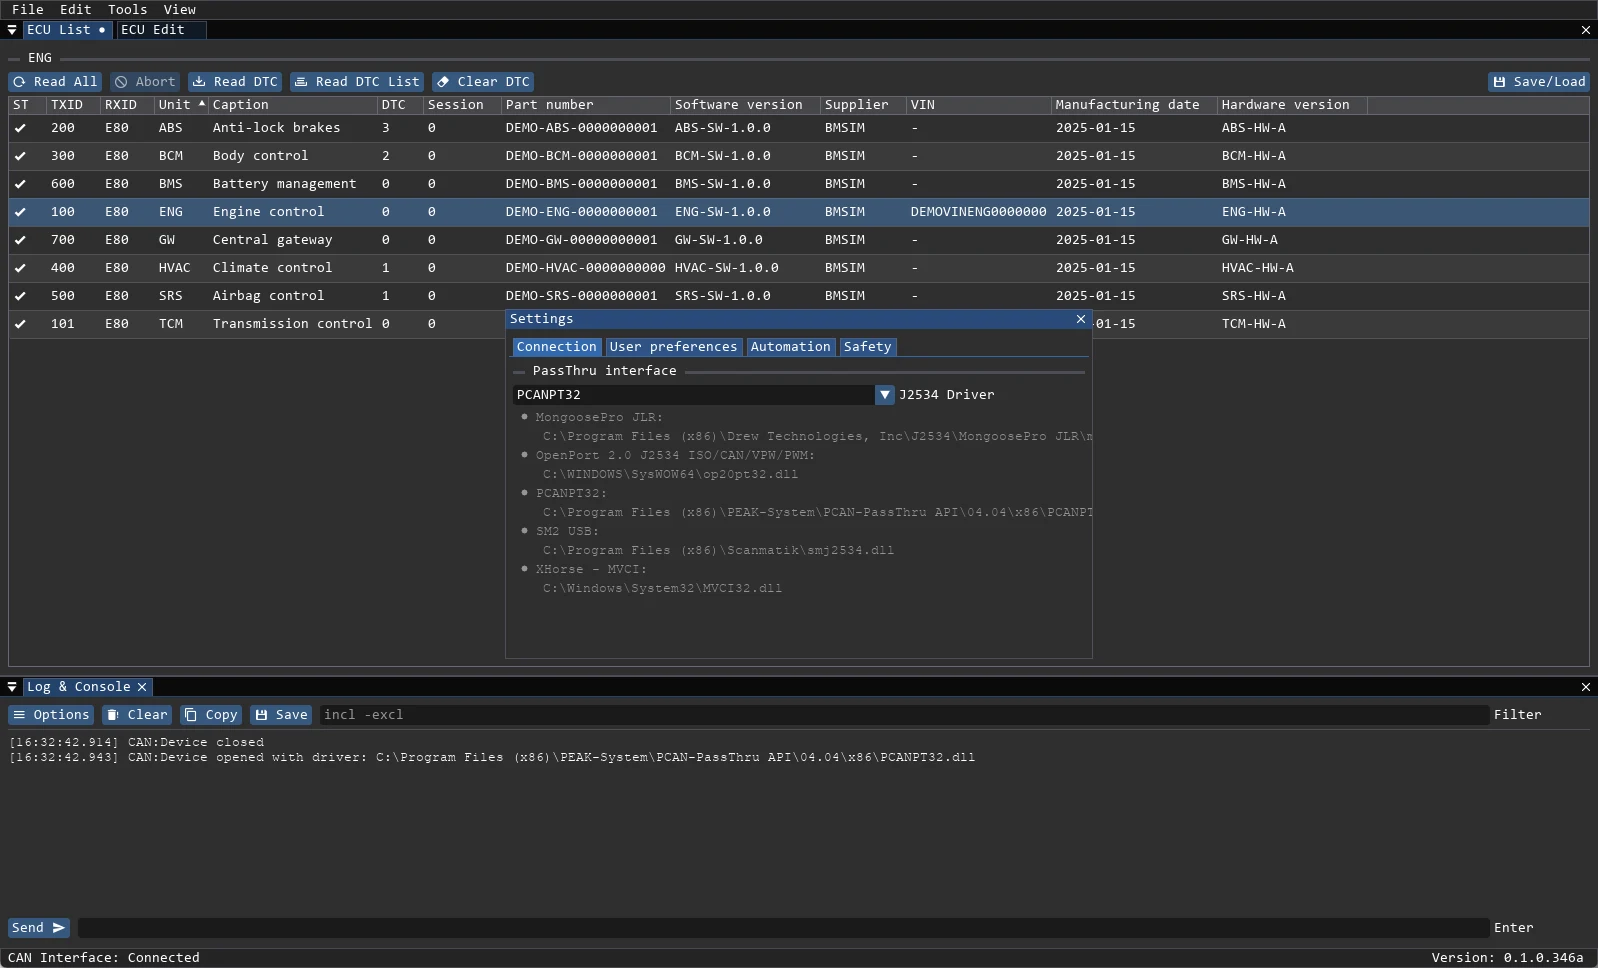
- Open View → Settings → PassThru Interface.
- Select the J2534 driver. Switching the driver reconnects the application.
- Connect the adapter to the vehicle and switch the ignition on.
- The status bar should show
CAN Interface: Connected.
If the adapter opens but the ECU does not answer, the problem is usually the request/response IDs, the bit rate or the 11/29-bit mode, not the driver.
DoIP over Ethernet
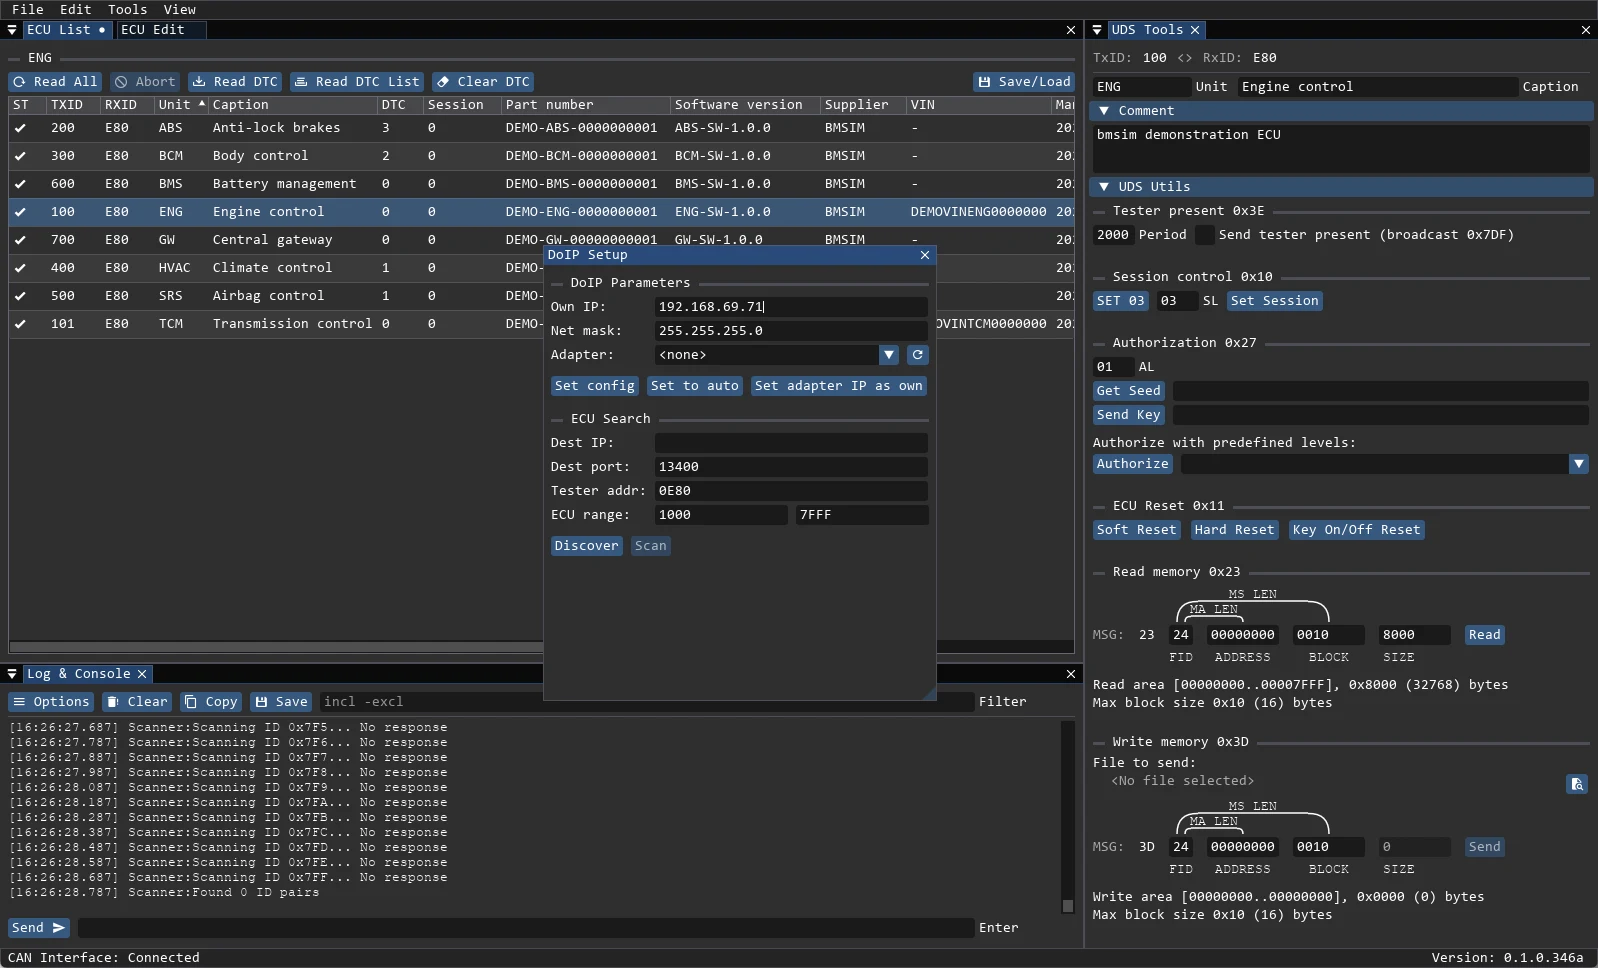
- Open Tools → DoIP Setup.
- Select the network adapter and set Own IP and Netmask. Use Configure Static IP or Set DHCP.
- Enter the Destination IP and Port, usually
13400. - Set the Tester Address, usually
0x0E80. - Press Discover to find vehicles by UDP discovery.
- Set ECU Address From / To and press Scan to probe logical addresses. Found ECUs can be added to the project.
Verify the link
Open the ECU and press Refresh Info on the Info tab. A decoded VIN or part number proves that addressing, transport and session control all work. Do this for each ECU before starting a large read.
Mixed projects
A project can mix transports: a CAN engine ECU and a DoIP gateway in the same vehicle. The transport is a property of each .bmecu file, so switching one ECU does not affect the others.